Restoration of CAUCASIAN SABER - From Silence to Strenght
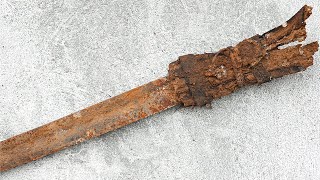
Hi! Today restoration video of a Caucasian saber. This piece doesn’t belong to me — a friend of mine asked me to restore it. The condition was below average: the handle was broken in two places, the scabbard was in terrible shape, missing its fittings, and the blade had visible rust. Well, time to restore.
First, I disassembled the saber, removed the old broken handle, threw out the damaged scabbard, and moved on to rust removal. I placed the blade in a rust remover solution for several hours. Once the rust was gone, I neutralized the acidic residue by soaking the blade in warm water with baking soda. After drying, it thoroughly, I applied some oil and began a light sanding. I used sandpaper ranging from 120 to 600 grit, just enough to clean up the surface while preserving the blade’s historical character.
Additionally, the tip of the blade was bent, so I carefully corrected it using a fine-grit sharpening stone. Once the blade was fully cleaned and preserved, I moved on to crafting a new handle.
For the handle, I chose solid, dry beech wood reliable and strong. I carved a slot for the tang, and since the tang was quite short, I extended it a few centimeters for a more secure fit inside the handle.
The first handle I made unfortunately cracked near the end of the process, so I started over. The second attempt turned out well. I secured the handle using epoxy resin and a rivet with two washers. After drying, it cure for 24 hours. I shaped and sanded it. As I worked on reinforcing the bottom part, the new handle cracked again. Replacing it a second time wasn’t an option — but I managed to repair and firmly secure the broken part. After final shaping and sanding, the handle was complete.
Then I moved on to the scabbard. I used dry wood, carved the required form, glued the two halves together, and after a day of drying, shaped and smoothed it. I then covered the scabbard in thin black leather using strong adhesive. For the finishing touch, I slightly darkened the handle using a two-component hair dye.
Lastly, I created the missing scabbard fittings. For that, I used 1mm thick brass. Each fitting was first annealed and cooled in water to soften the metal, then shaped by hand. I soldered the parts using copper. After crafting three decorative pieces, I sanded and polished them, then gave them an aged look for authenticity. I attached them securely to the scabbard, bringing the project to completion.
In the end, the saber feels comfortable in the hand, is well-balanced, and looks the way it was meant to.
Thanks for watching — and don’t forget to share this video if you enjoyed it!
Sincerely, Alex. Thanks for attention!
Good luck and health to everyone! With best wishes, Alex!
Please subscribe to my channel: @ScrewsAndTools
🍖 My New Cooking channel! @screwsandtoolscooking
Patreon: https://www.patreon.com/Screwsandtools
Paypal: paypal.me/screwsandtools
Facebook: https://www.facebook.com/scresandtools/
Instagram: https://www.instagram.com/screwsandtools/
#screwsandtools #saber #restoration

 21:49
21:49
 25:59
25:59
 28:07
28:07
 22:11
22:11
 16:45
16:45
 23:10
23:10
 35:50
35:50
 22:33
22:33
 22:54
22:54
 1:00:00
 24:36
24:36
 15:07
15:07
 19:57
19:57
 51:19
51:19
 20:39
20:39
 46:49
46:49
 31:20
31:20
 25:29
25:29
 36:42
36:42
 14:17
14:17


