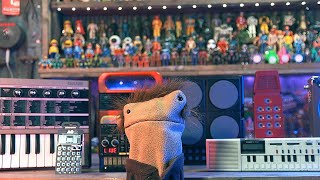
How I Animate Without Taking A Year (Or Ten) | Jittery Paper Animation
MORE ANIMATION DETAILS BELOW!
We couldn't do what we do without direct support, so if you would like to be a part of keeping us going, please consider supporting us directly through:
Patreon, Paypal OR Ko-fi:
http://patreon.com/steadycraftin
https://ko-fi.com/steadycraftin
https://www.paypal.com/donate/?hosted_button_id=Y3UP4JVA46MXS
(On Patreon, you'll also get access to the printable 3D scans of my original sculpted figures, MP3s, exclusive behind-the-scenes videos, shop discounts, and more.)
My family and I are so grateful that I get to do this.
STICKERS, PINS AND FIGURES WHEN AVAILABLE FULFILLED BY US:
https://shop.crafnation.com/
MUGS, SHIRTS AND MORE FULFILLED BY SPRING:
https://steady-craftin.creator-spring.com/
AMAZON AFFILIATE STOREFRONT:
https://www.amazon.com/shop/thecrafsman?ref=ac_inf_tb_vh
FACEBOOK
https://www.facebook.com/thecrafsman/
INSTAGRAM
@steadycraftin
GEAR I USE:
CAMERAS:
https://amzn.to/2YbUz5v
MICROPHONE:
https://www.adorama.com/RDVIDMICPP.html
LIGHTS:
https://amzn.to/2MnPMew
TRIPODS:
https://amzn.to/3iFlro7
NOTE:
There are other programs and methods out there. (Adobe Character Animator, for example.)
This workflow is not necessarily the most intuitive.
But this is the approach I LIKE and that I USE.
SOFTWARE I USE:
Inkscape, Edius, After Effects
You can use your preferred software.
Download Inkscape here:
https://inkscape.org/
PROCESS I USE:
- Draw a character on paper.
- Get it into the computer. (Scan, digital photo, etc.)
- Load image into InkScape and convert it into a vector ("ink lines").
- Design mouth shapes (and eyes, etc.) in InkScape.
- Export the character and mouth shapes as images (32-bit PNG).
- In Edius (or any video editor), place mouth shapes on a video track above the character, in sync with the audio.
- Export animation into After Effects for processing using these filters:
***** ROUGHEN EDGES - Applied to the "ink" layer.
(I mainly adjust Border, Edge Sharpness, and Scale.)
***** TURBULENT DISPLACE - On an overall Adjustment Layer:
(I mainly adjust Amount and Size.)
***** WIGGLE - For the moving paper, I just bring in a paper texture image and apply a WIGGLE expression.
(Example: "WIGGLE(12,1000)") To the paper layer, I apply a MOTION TILE effect and check "Mirror Edges".
- POSTERIZE TIME: Set to 12 FPS. Applied to the final composition before rendering. (I usually put it all in a separate composition.)
For an exaggerated stop-motion look, try 8 FPS.
- There are MANY things you can do to change this. Experiment with overlaying the ink layer onto the paper using "Linear Burn" or other overlay modes. Same thing for the color layer, if you have one - experiment with "Multiply" or "Color" overlay modes, to have it blend into the paper.
AFFILIATE LINK NOTICE
“As an Amazon Associate I earn from qualifying purchases.”

 19:04
19:04
 26:43
26:43
 18:17
18:17
 24:59
24:59
 17:58
17:58
 14:37
14:37
 39:10
39:10
 20:21
20:21
 26:45
26:45
 14:59
14:59
 14:45
14:45
 21:51
21:51
 27:55
27:55
 12:00
12:00
 10:06
10:06
 9:11
9:11
 13:12
13:12
 19:05
19:05
 18:55
18:55
 16:00
16:00


