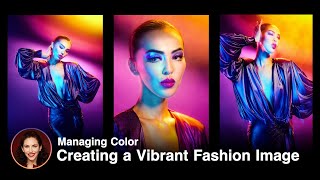
In this Photo Deconstruction I demonstrate how to use Adobe Photoshop's Generative Fill to enhance this fashion image.
What is generative fill?
--
Generative Fill is an AI (artificial intelligence) tool powered by Adobe Firefly that enables you to add and remove content from images nondestructively using simple text prompts to achieve realistic results. This tool is part of the latest editions of Photoshop.
---
⭐⭐⭐
This image was taken during one of my workshops -- if you'd like to see what's coming next be sure to visit http://workshops.lindsayadlerphotography.com
⭐⭐⭐
1:13 Behind the Scenes
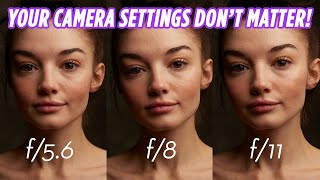
3:43 Camera settings
4:07 Final image
7:00 Post processing
8:12 Using Generative fill
💡Lighting (3)
1. **Main Light**:
- Type: Profoto D2
- Modifier: Westcott Optical Spot + lens kit
- Position: Right-hand side
- Purpose: Creates a concentrated area of light on the face and torso, emulating a vintage feel.
- Additional Features: Shutter doors to control the spread of light.
2 & 3. **Background Lights**:
- Type: Two strobes with small white umbrellas
- Position: Left and right sides, pointed towards the background
- Purpose: Illuminates the background to achieve a clean, high-key look.
This setup creates a controlled lighting environment with emphasis on the subject's face and a clean, high-key background. Additionally, the use of specific modifiers and techniques like the optical spot adds to the desired aesthetic, while the camera settings ensure optimal exposure.
🖌 Post Processing
- Converted the image to black and white.
- Adjusted contrast and clarity.
- Cleaned up the floor.
- Added sculpting to the middle of the dress.
- Added contrast to the subject's face.
- Extended the frame using generative fill.
- Used generative fill to add more fabric to the dress train.
- Made selective adjustments to enhance specific areas of the image.
- Erased elements added by generative fill that weren't desired.
- Finalized retouching to achieve the desired dramatic effect.
📢 I’d love to hear your thoughts on the final outcome. Drop a comment below!
📸 Camera Settings:
✅ 1/200th
✅ F/4.5
✅ ISO 500
📸 Gear Used:
✅ Canon EOS R5: https://adorama.rfvk.net/JxzdE
✅ Canon 24-105mm 4.0 RF: https://adorama.rfvk.net/q74XY
✅ Profoto D2: https://adorama.rfvk.net/qvB7y
✅ Westcott Optical Spot: https://lindsayadler.photo/wcopticalspot
✅ Profoto Small Umbrella: https://adorama.rfvk.net/dvR1j
✅ Profoto Air Remote: https://adorama.rfvk.net/W3o5G
✅ Avenger D600 boom arm: https://adorama.rfvk.net/XRdAG
✅ Savage C-Stand: https://adorama.rfvk.net/J1ZW2
✅ Tether tools Tether Cable: https://adorama.rfvk.net/avr5q
✅ Savage Seamless Super White: https://adorama.rfvk.net/e2R6z
🔥 To learn more about different lighting techniques I encourage you to check out my class: Master Studio Lighting: https://lindsayadler.photo/msl
👉 All upcoming workshops: https://lindsayadler.photo/workshops
----
👉 Portfolio: http://lindsayadlerphotography.com
👉 Instagram: http://instagram.com/lindsayadler_photo
👉 Facebook: http://facebook.com/lindsayadlerphotography
👉 Twitter: http://twitter.com/lindsayadler
👉 Education: http://learn.lindsayadlerphotography.com
Some of the links in this description contain affiliate links to partners.

 14:28
14:28
 15:36
15:36
 9:31
9:31
 10:55
10:55
 10:03
10:03
 16:34
16:34
 12:11
12:11
 16:09
16:09
 14:31
14:31
 17:06
17:06
 20:53
20:53
 20:52
20:52
 20:02
20:02
 11:00
11:00
 16:11
16:11
 18:36
18:36
 7:59
7:59
 13:51
13:51
 9:32
9:32
 11:46
11:46


