Using multiple bevel deformers - CINEMA 4D TUTORIAL
Join me on Rarible!
https://rarible.com/niels
Let's share some #NFT work.
Welcome to a new Video 4 tutorial.
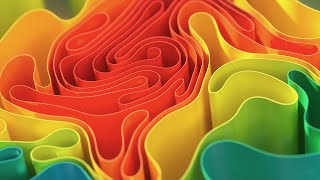
In this video I will show you how to create some weird looking shapes with bevel deformers inside Cinema 4D. So let’s start.
First we create a sphere. Then, we change the type from standard to icosahedron. Turn down the amount of polygons from 24 to 12, and we’re done with the sphere.
Now let’s create a bevel deformer. Select both the bevel deformer and the sphere and add then to a null object by pressing Alt G on your keyboard. Do not parent the bevel deformer to the sphere, this makes it easier later on when you want to use other shapes.
Next we change the component mode from edges to polygons, and set the bevel mode to proportional. Switch to the Polygon Extrusion tab and change the Extrusion from 10 centimeters to 0. Make sure Preserve Groups is switched off.
When we go back to the Option tab and let’s see what happens when we use the Offset slider. That looks great. Let’s set it to 30% for now.
Now you wan’t to copy the bevel deformer and paste it above our Null Object. Group the Null and the copied bevel deformer into a new null object by pressing Alt G.
By copying and grouping the bevel deformer we added a extra layer of polygons to our sphere. Do the same trick again to add a third layer of polygons.
Now let’s give this guy some depth. Go down to our first created bevel deformer, select Poly Extrusion and change it from 0 to 5 centimeters. Then go to the second bevel deformer en set the Poly Extrusion to 5 centimeter as well. Do the same trick to our last deformer. Maybe use 2 centimeters instead of 5 for this one.
This looks great. Now we want to animate this guy so let’s create a animation controller.
We change the name of our main Null object to Bevel controller. Navigate down to User data and click on Add User Data. Now change the name of the controller to anything you want. Let’s just name it Bevel. Hit OK and we created a controller that we can animate. But nothing is happening off course. We need to map the controller to our bevel deformers.
Let’s add a XPresso tag to our main null object. Now simply drag the Bevel deformer, our main null object, to our XPresso grid and then right mouse click to set the output to our newly created controller called Bevel. Then select all three bevel deformers and drag then inside our XPresso grid as well. Let’s organise them a bit
Now let’s see what parameter we want to animatie. In this case it’s the Offset parameter. Now we will link the Bevel output to the Offset parameters from our bevel deformers. Simply drag a line to the blue square and navigate down to Option and Offset. Repeat the same steps to the two other bevel deformers. And we’re done!
You’ve probably noticed that our subdivisions disappeared on our sphere. That’s because our newly created controller is still set to the default of 0%. Just crank it up to the amount of deformation you want.
It’s that easy. I hope you enjoyed this video. Take a look on my website and hopefully until next time!

 4:26
4:26
 18:55
18:55
 21:42
21:42
![Debata Prezydencka TVP: Kto mówi prawdę, a kto gra pod obce dyktando? [Mocny komentarz]](https://i.ytimg.com/vi/K4g_S65Yg-0/mqdefault.jpg) 52:07
52:07
 17:49
17:49
 6:18
6:18
 11:16
11:16
 27:53
27:53
 3:52
3:52
 13:17
13:17
 7:40
7:40
 7:02
7:02
 10:31
10:31
 9:22
9:22
 44:49
44:49
 21:05
21:05
 9:36
9:36
 15:09
15:09
 4:46
4:46
 10:10
10:10


