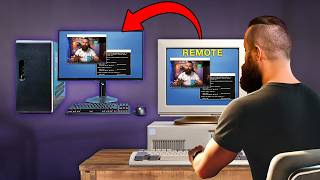
Want to run your own automation server without paying a dime? In this video, I’ll show you step-by-step how to install and self-host n8n locally using Docker and Ngrok — giving you a free public domain for webhooks and unlimited workflows.
Whether you want to automate Telegram messages, AI bots, social media posts, or customer support workflows — this setup has you covered.
📚 SUMMARY
This video covers how to self host n8n in the cloud and on your computer under 5 Minutes.
✅ No subscriptions
✅ Full control
✅ Supports over 400+ integrations
https://t.me/PengiCode
📌 Tools Used: ( not sponsored )
Docker
Ngrok
n8n
📎 Copy-paste env variables :
EDITOR_BASE_URL=
WEBHOOK_URL=
N8N_DEFAULT_BINARY_DATA_MODE=filesystem
N8N_COMMUNITY_PACKAGES_ALLOW_TOOL_USAGE=true
N8N_RUNNERS_ENABLED=true
Container path:
/home/node/.n8n
💬 Got stuck? Drop your questions in the comments.
👍 Like, 🔔 Subscribe, and stay tuned for more no-BS tech guides.
⏱️ Timestamps
00:00 - Intro
00:10 - What is n8n?
00:30 - Install Docker & Ngrok
00:58 - Install Docker & Pull n8n Image
01:24 - Install Ngrok & Authenticate
01:42 - Claim Free Static Domain
02:30 - Set Port, Folder & Volume Mount
03:22 - Set Environment Variables
03:40 - Run n8n Container
04:06 - Access n8n Dashboard
04:14 - Test Webhook with Ngrok Domain
04:30 - Outro
#n8n #Automation #Docker #Ngrok #SelfHosted #OpenSource #NoCode #WorkflowAutomation #n8nTutorial #SelfHosting #DevTools #TechTutorial #FreeTools #Webhooks #AITools #TelegramBot #n8nWorkflow #LocalHosting #n8nDocker #FreeHosting #freevps #nocreditcard #prodction #public

 1:03:15
 13:58
13:58
 22:30
22:30
 17:09
17:09
 5:38
5:38
 22:33
22:33
 51:06
51:06
 17:14
17:14
 27:47
27:47
 13:44
13:44
 14:18
14:18
 8:14
8:14
 5:58:32
 24:14
24:14
 10:57
10:57
 7:23
7:23
 33:00
33:00
 14:39
14:39
 26:18
26:18
 22:46
22:46


