Router on a Stick vs. Layer 3 Switch (SVI) | Understand Default Gateway and Sub interface & SVI
Are you ready to master Inter-VLAN Routing? In this video, I’ll walk you through two powerful methods to connect multiple VLANs:
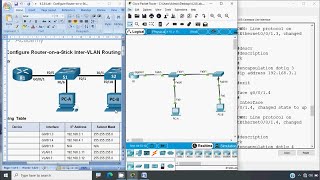
Router-on-a-Stick configuration with subinterfaces.
Layer 3 Switch setup using Switch Virtual Interfaces (SVIs).
We’ll demo everything step by step in EVE-NG, covering why you need Inter-VLAN Routing, how to configure subinterfaces, and when to use an L3 switch for scalable performance. We’ll also review key concepts like gateway, default gateway, subinterface, and SVI to make sure you understand the fundamentals before we jump into the lab.
Topics Covered
Explanation of Gateway & Default Gateway
Subinterface Config for Router-on-a-Stick
Creating SVIs on a Layer 3 Switch
Verifying connections and troubleshooting tips
By the end of this video, you’ll know exactly how to set up inter-VLAN communication, boost network performance, and understand the best use cases for each approach.
If you find this helpful, give it a thumbs up, subscribe for more networking tutorials, and leave a comment with any questions or insights you have!
#InterVLANRouting
#RouterOnAStick
#Layer3Switch
#SVI
#NetworkingTutorial
#EVEng
#NetworkEngineering
#CiscoLab
#VLAN
#Subinterfaces
Configurations Below:
Use case 1: Router on a Stick
Layer 2 Switch
enable
configure terminal
!
! Create the VLANs
!
vlan 1
name MANAGEMENT
exit
vlan 10
name VLAN10
exit
vlan 20
name VLAN20
exit
!
! Configure the trunk port (connecting to the router)
!
interface e0/0
description *** Trunk to Router ***
switchport trunk encapsulation dot1q
switchport mode trunk
no shutdown
!
! Access port for VLAN 10
!
interface e0/1
description *** VLAN10 Access ***
switchport mode access
switchport access vlan 10
no shutdown
!
! Access port for VLAN 20
!
interface e0/2
description *** VLAN20 Access ***
switchport mode access
switchport access vlan 20
no shutdown
!
interface Vlan 1
Ip address 192.168.1.253 255.255.255.0
!
ip default-gateway 192.168.1.254
!
end
write memory
Router
configure terminal
!
! Physical interface to switch—no IP on the base interface, just up/up.
!
interface g0/0
no shutdown
!
! Sub-interface for VLAN 1 (Management or Native VLAN if applicable)
!
interface g0/0.1
encapsulation dot1Q 1
ip address 192.168.1.254 255.255.255.0
no shutdown
!
! Sub-interface for VLAN 10
!
interface g0/0.10
encapsulation dot1Q 10
ip address 192.168.10.254 255.255.255.0
no shutdown
!
! Sub-interface for VLAN 20
!
interface g0/0.20
encapsulation dot1Q 20
ip address 192.168.20.254 255.255.255.0
no shutdown
end
write memory
Use case 2: Using Layer 3 Switch and SVI
Layer 3 Switch
enable
configure terminal
Hostname layer_3_switch
!
! Enable IP routing on the switch
!
ip routing
!
! Create VLANs
!
vlan 10
name VLAN10
exit
vlan 20
name VLAN20
exit
!
! Create an SVI for each VLAN
!
interface vlan 10
ip address 192.168.10.254 255.255.255.0
no shutdown
!
interface vlan 20
ip address 192.168.20.254 255.255.255.0
no shutdown
!
! Assign physical ports to the correct VLAN
!
interface e0/1
switchport mode access
switchport access vlan 10
no shutdown
!
interface e0/2
switchport mode access
switchport access vlan 20
no shutdown
end
write memory

 19:49
19:49
 32:41
32:41
 3:03:31
 22:46
22:46
 32:33
32:33
 3:24:55
 11:16
11:16
 28:39
28:39
 27:14
27:14
 3:22:50
 24:06
24:06
 48:25
48:25
 11:50
11:50
 6:02
6:02
 16:10
16:10
 11:24
11:24
 20:12
20:12
 18:59
18:59
 27:14
27:14
 9:38
9:38


