I found this beefy pipe cutter at the bottom of a crate of rusty tools I bought for $10. It was the same crate of tools that contained the railroad lantern I restored earlier this year (
https://youtu.be/aC4u68zVqBs)!
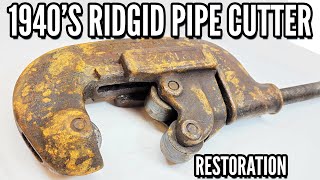
This No. 1-2 pipe cutter was made by the Ridge Tool Company, otherwise known as the same Rigid toolmaker you commonly see today. Although the patent date for this pipe cutter dates to the 1920’s, Rigid relocated their operations to Elyria, OH in 1943. This probably puts the manufacture date of this pipe cutter in the 1940’s or 1950’s, especially considering that all the other tools in the crate with it were also made around that same time. The 2021 version of this would retail in the range of $100-$300.
Instagram: @catalyst_restorations
Have a cool item you’d love to see repaired? Did you recently complete a restoration project of your own? Send me some mail at
[email protected]!
Video timestamps:
0:00 –
1:00 Overview
1:01 –
3:33 Disassembly
3:34 –
4:20 Sanding and polishing pins
4:21 –
5:28 Sanding and polishing rollers
5:29 –
6:40 Sanding and polishing cutting wheel
6:41 –
8:24 Electrolysis of jaws and main body
8:25 –
10:51 Wire wheeling and sanding of jaw and main body
10:52 –
12:43 Priming and painting jaw and main body
12:44 –
13:59 Wire wheeling, sanding, and polishing handle
14:00 –
14:25 Priming and painting handle
14:26 –
16:09 Reassembling
16:10 –
16:34 Before and After
16:35 –
17:29 Testing
17:30 –
17:44 Thanks for watching and please subscribe!
Project notes:
This is the first 4K UHD Catalyst Restorations video! Video was shot using a Samsung Galaxy S21+ in 4K UHD. Flagship phone cameras have come a long way!
Disassembly was straightforward. The rollers and cutting wheel must be removed first before the bottom jaw can be brought up enough to remove from the main body. This is a typical disassembly of most pipe cutters. Sanding and polishing the pins and rollers was straightforward as well – sanding only enough to remove the rust but not enough to change critical dimensions. Sanded to 2000 grit and then polished with white compound. The drill press helps make sanding go quickly. For the jaws and main body rust removal, a DIY electrolysis setup can be done like so:
https://youtu.be/lqf0iPlOgVY. I use a modified laptop charger for all my electrolysis and it works perfectly. For casting/forging clean-up I decided to only remove the worst of it. I could’ve spent days grinding and polishing all surfaces perfectly smooth, but in my opinion that takes away most of the character it has left. For priming, I tried out Rustoleum’s 2 in 1 filler/sandable primer. Even with 3 coats and after some light sanding it didn’t smooth the surface noticeably; at least not for the time and effort it took. I went back to self-etching primer for the main body. For paint I originally chose Rustoleum’s metallic spray paint in dark cherry, because I wanted to capture Rigid’s traditional red pipe cutter color but with some flair….and also every store in a 30 mile radius and online was sold out of Rustoleum’s brighter ‘apple red’ metallic paint which was my first choice. The spray painting you see in this video is the dark cherry color, which when wet is a vibrant metallic. However, after drying it dulled considerably – very disappointing. I switched to Rustoleum’s hammered red, which was both more vibrant in color and also gave a hint of metallic texture. I sealed everything afterwards with clear coat. Assembly was also straightforward – no hang-ups there except for paint in a few spots that had to be removed where the rollers fit in. I tested the pipe cutter on a scrap piece of aluminum, which was like a hot knife through butter; totally overkill using this pipe cutter on it, but I didn’t have any scrap steel tubing lying around. Just watch the cutting demonstration portion at 0.25x and you’ll get the idea of what it would look like! Total project time was roughly 40 hours.
#restoration #pipecutter #toolrestoration