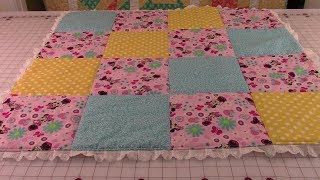
Personalized Baby Name Quilt Tutorial
Today I'm sharing how to make a 32x32 personalized baby quilt. However, this technique can be applied to any size quilt and even used on other items like sweatshirts, book bags, etc.
Find a full tutorial with links on my blog: https://www.southernsewingco.com/post/personalized-baby-quilt-tutorial
Follow me on Instagram! @southernsewingco@southernsewingcompany
P.S.: If you click and purchase, I may receive a small commission at no extra cost to you. I only recommend products that I’ve personally vetted and loved. Southern Sewing Co. is reader-supported. Affiliate links help me to offer this content to you for free :)
Supplies:
-HeatNBond Lite - Don't skip this! https://amzn.to/3s70dF4
-1 yard of White Kona Fabric- https://amzn.to/3TnOluA
-1 yard of backing (Here I'm using Saturday in Paris by Riley Blake): https://amzn.to/48vcffp
-Crib-sized white cotton batting- https://amzn.to/477xV15
-Light Box- or another source of light- https://amzn.to/3gmoJ2y
-Detail Scissors- these are my FAVORITE but technically any kind would work- https://amzn.to/3Sg11SK
-X-Acto Knife- not totally necessary but it makes small details easier- https://amzn.to/3TBHzRy
-White cotton thread- or coordinating color- https://amzn.to/3eHWY3O
-6" x 24" Quilting Ruler- or long straight edge- https://amzn.to/3F4ph7r
-Sewing clips -https://amzn.to/3VEZsAB
Set-Up:
-Cut the white/front fabric to 32" x 32"
-Cut the batting fabric to 34" x 34"
-Cut the backing fabric to 36" x 36" and save the extra for your name.
For the Name:
-I used PicMonkey (www.picmonkey.com). This is the Jeremy font.
-Here is the printer that I use, but any HP printer uses the same app that I'm using in this tutorial. https://amzn.to/3EQFdcb
I'm always happy to answer questions!
Find me on Pinterest: https://www.pinterest.com/SouthernSewingCompany/
Instagram @southernsewingco

 23:40
23:40
 20:43
20:43
 21:28
21:28
 15:52
15:52
 45:09
45:09
 16:13
16:13
 19:02
19:02
 31:12
31:12
 45:02
45:02
 30:14
30:14
 25:46
25:46
 19:41
19:41
 19:01
19:01
 26:25
26:25
 16:48
16:48
 20:08
20:08
 8:05
8:05
 16:06
16:06
 11:28
11:28
 19:00
19:00


