The handwheel on the Mini Lathes carriage annoyed me quite some time. It wasn't properly supported by bearings and got sticky over time. Besides it was very wobbly, a bit too small and the handle unscrewed it self when turning the handwheel.
The plan came up to replace the handwheel, install some proper bearings and additionally add a dial to the handwheel. I missed a way of indicating the travel of the bedslide quite often in the past that I necessarily wanted to include a big dial to the modification. Off course you can install a digital readout which will be much more accurate but I wanted to go the old scool way here.
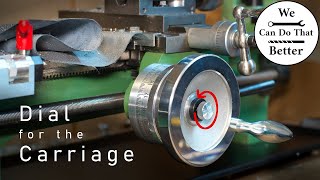
A problem was to figure out the travel of the bedslide per turn of the handwheel. This is important for making the dial. In it's factory configuration the bedslide travelled about 19,2mm per revolution of the carriage handwheel. That is quite an odd number and useless for an easy to read dial. With a little bit of math I found out that by changing one gear in the Mini Lathes bedslide apron from 24 to 25 teeth I'll get a travel of almost exactly 20mm. That's just perfect for a 200 dividion scale I then machined. The scale indicates the travel with a resolution between the lines of 0,1mm.
The result is quite satisfying. Not just that it looks great in my eyes and much more "real precision lathe like", it also feels so much better than the old plastic handwheel. Due to the two installed bearings it feels now extremely solid and turns smooth. The slightly larger aluminium handwheel and handle feel very comfortable.
As you see in the end the handle of the cross slide now collides with the new bedslide handwheel. That is to fix next :)
00:00 Intro
00:24 Measuring and calculating the travel of the lathe carriage
01:39 All parts needed
01:52 Making the backplate/bearing seat
04:18 Turning the bedslide dial
05:25 Engraving the dial on the lathe
07:35 Knurling
07:52 Punching the numbers into the dial
08:32 Turning the shaft
09:56 Milling the keyways
10:13 Turning and keyway cutting the new gear
10:43 Keyway cutting on the new handwheel
11:26 Turning brass spacers
12:19 Machining a steel nut
13:22 Boring the new bearing seat in the apron
14:56 Drilling mounting holes to the apron
15:28 Clamping knob
15:54 Dial clamping mechanism
16:39 filling the engravings on the dial with lacquer stick
17:03 All parts and assembling everything
If you have questions or suggestions, please let me know in the comments. I'll read them all and try to reply to everyone.
I hope you enjoy this video. Feel free to comment, like and subscribe to the channel.
Thank you!
Instagram page: https://www.instagram.com/wecandothat...
Keep in mind, due to very limited resources, I have to improvise a lot and go unconvenient ways which may upset some of the "real machinists" out here. Hope - with some creativity - in the end come to good resoults anyway.
- Adjustable Carriage Stop:
https://www.youtube.com/watch?v=EpWPT0yWZv4
- Mini Lathe compound angle modification: https://www.youtube.com/watch?v=rdkoT...
- Mini Lathe tailstock fine adjustements:
https://youtu.be/5Kv2QG9DXf8
- Mini Lathe bearings for the compound slide:
https://youtu.be/EOeR_ed5HsY