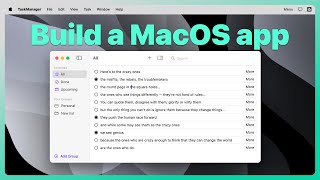
Start macOS app development in this SwiftUI tutorial where I guide you through creating a screenshot app from scratch. Learn how to leverage command line tools for powerful functionality, manage images with NSPasteboard, and enhance your app’s interface with SwiftUI’s LazyVGrid and drag-and-drop features.
This is the first part of a series where you will learn about macos app develeopment. This series will equip you with the skills to build a native and polished macOS application.
🔹 What You’ll Learn:
- How to use command line tools in SwiftUI.
- Integrating screencapture for taking screenshots.
- Managing images with NSPasteboard.
- Creating a dynamic grid layout using LazyVGrid.
- Implementing drag and drop functionality.
- Handling different screenshot types with ease.
00:00 Introduction to the screenshot app project
04:44 Using command line tools
08:36 What can you build with command line tools
11:57 Taking screenshots in SwiftUI with screencapture
17:29 Getting the images from NSPastboard
20:40 Grid layout with LazyVGrid
24:27 Drag and drop images
26:37 Taking different types of screenshots
29:27 Wrap up
If you want to publish an app with screen capture, make sure to add privacy settings. This is the guide from apple: https://developer.apple.com/documentation/avfoundation/capture_setup/requesting_authorization_to_capture_and_save_media
If you liked what you learned and you want to see more, check out one of my courses!
👨💻 macOS Development with SwiftUI course https://learn.swiftyplace.com/macos-development-swiftui-course
👨💻 my Core Data and SwiftUI course https://learn.swiftyplace.com/swiftui-core-data-mastery-course
⬇️ Download project starter: https://github.com/gahntpo/ScreenshotApp/tree/main
PART 2:
https://youtu.be/oQL9nrzV_Ok
#SwiftUI #macos

 32:31
32:31
 3:25:33
 53:36
53:36
 29:08
29:08
 15:46
15:46
 28:14
28:14
 13:20
13:20
 1:56:20
 24:26
24:26
 40:59
40:59
 31:51
31:51
 6:58
6:58
![Upbeat Lofi - Deep Focus & Energy for Work [R&B, Neo Soul, Lofi Hiphop]](https://i.ytimg.com/vi/THh4fT0O7IY/mqdefault.jpg) 3:22:29
3:22:29
 33:11
33:11
 1:03:15
 16:05
16:05
 20:56
20:56
 13:44
13:44
 1:02:49
 8:13
8:13


