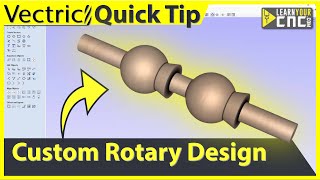
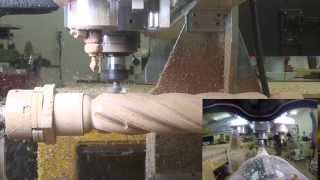
In this tutorial we are going to show you how to take a full 3D model, import it into the software and unwrap it to create toolpaths to cut on a rotary axis.
BOOKMARKS:
~ Introduction -
00:10
~ Job setup -
00:27
~ 3D rotary model overview -
01:21
~ Importing and setting up a 3D model -
01:57
~ Import 3D model form overview -
02:37
~ Table leg 3D model example -
08:20
~ Model scaling and adjustment -
11:13
~ Software unwrapping rotary job overview -
13:14
~ Adding tabs to the 3D model -
14:13
~ Toolpath setup -
15:40
~ 3D roughing toolpath -
16:33
~ 3D Finishing toolpath -
18:23
~ Summary -
20:51
To download the files used in this tutorial, view related videos or take advantage of our bookmarking system within the videos please head over to the support section of our website here:
https://www.vectric.com/support/tutorials/aspire
#Vectric #CNCsoftware #CNCtutorial #VectricSoftware #CNCsoftwaretutorial #CNC #WrappedRotary #WrappedRotaryMachining #VCarve #Aspire #X2A #Y2A #RotaryMachining #ToolpathSetup #RotaryToolpaths #RotaryToolpath #3DRoughing #3DFinishing #ImportModel #Import3DModel #ImportRotaryModel
Subscribe to Vectric on YouTube: https://www.youtube.com/user/Vectric?sub_confirmation=1
See more Vectric tutorial videos and downloadable files: https://www.vectric.com/support/tutorials/aspire?playlist=TutorialCategories&category=all
Vectric on Facebook: https://en-gb.facebook.com/vectric/
Vectric on Instagram: https://www.instagram.com/vectricltd/

 9:03
9:03
 30:09
30:09
 56:12
56:12
 29:52
29:52
 45:53
45:53
 50:42
50:42
 28:30
28:30
 10:45
10:45
 8:24
8:24
 20:33
20:33
 41:47
41:47
 12:09
12:09
 40:02
40:02
 35:11
35:11
 27:29
27:29
 14:13
14:13
 25:50
25:50
![How To Do 3D Projects Tutorial w/ Vectric Vcarve & Aspire [For CNC Routers] - Garrett Fromme](https://i.ytimg.com/vi/l6E64E3d5FY/mqdefault.jpg) 53:07
53:07
 22:30
22:30
 11:50
11:50


