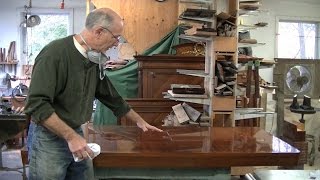
Join Jamie Neville-Young, in the Dealing in Design workshop as we take you through a step-by-step repair of chipped veneer on an antique occasional table. In this video, Jamie shows how to splice in a piece of burl maple to replace the missing veneer. This is a super clean and effective technique you can use on damaged veneer of all kinds. This technique is applicable for many different timbers and suitable for all eras.
Filmed by Ned Johnstone, produced by Fabrica Cine. This restoration is perfect for anyone wanting to learn how to perform a beautiful little veneer patch.
00:00 Introduction
00:27 The Veneer Selection - Book Matching
00:56 Revlealing The Grain With Ethonol
01:17 The Unknown History Of This Piece
02:06 How To Cut Your Own Shape
02:59 Marking Your Tape Template
03:18 Cutting Your Tape Template
03:42 Setting Your Template On New Veneer
03:53 Story Time
04:22 Placing The New Patch!
04:39 Trimming New Patch Down
05:40 Dry Run
06:16 Glueing Veneer Patch
06:40 Clamping
06:56 Un-Clamping - Reveal!
07:10 Sanding
07:27 Little Colouring Mock up
07:48 Repaired / Outro

 11:50
11:50
 37:35
37:35
 23:30
23:30
 27:06
27:06
 4:31
4:31
 21:00
21:00
 7:52
7:52
 23:23
23:23
 30:11
30:11
 30:25
30:25
 32:26
32:26
 18:50
18:50
 40:22
40:22
 16:39
16:39
 24:51
24:51
 33:35
33:35
 15:46
15:46
 39:55
39:55
 17:07
17:07
 40:08
40:08


