Go to https://www.photopea.com/
Photopea is an amazing free online photo editor that's just like Photoshop! 🥳
► CHECK OUT PRINTIFY: https://try.printify.com/9h3sdx5f0h7h
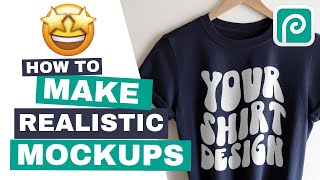
In this tutorial I'll show you how to overlay your PNG design onto a t-shirt mockup and then adjust the highlights and shadows to make your mockup look realistic! It's easy and only takes 5 minutes! 😄
NOTES:
Top Layer Adjustments:
1. On the top layer change the blending mode to "Hard Light".
2. Right-click on the top layer then scroll down and select "Clipping Mask".
3. Go to: -Image -Adjustments -Hue & Saturation
Move the saturation slider all the way to the left to desaturate the image.
4. Go to: -Image -Adjustments -Curves
Adjust the curve to change the highlights and shadows. Bring the line up on the bottom left corner. (This step will vary depending on if you're using a dark or light colored t-shirt.)
Here's a link to the tutorial using a white t-shirt:
https://www.youtube.com/watch?v=tErjU7iLVK8
Here's a link to the t-shirt mockup image that I used for this tutorial:
https://www.etsy.com/listing/1118956728/navy-t-shirt-mockup-hanger-t-shirt?click_key=b728ecb5aa9f2ca66154b79adc1d8bbeefa430a6%3A1118956728&click_sum=56fa6ce7&ga_search_query=navy&ref=shop_items_search_5&pro=1&sts=1
The font that I used for the t-shirt design is "Stay Trendy" by KA Font Designs on Etsy.
(I added a "Wave" effect to the text.)
https://www.etsy.com/listing/977452234/stay-trendy-font-retro-font-groovy-font?click_key=3b5bed09d8aef1ce9f3beaf3e0ba413d872e499f%3A977452234&click_sum=f12cb0bf&ga_search_query=stay%2Btrendy&ref=shop_items_search_1&pro=1&sts=1
Check out our shop on Etsy!
https://mockuploft.etsy.com
I hope you enjoyed this tutorial and found it helpful! Thank you for watching!
-Bridget
© Mockup Loft