In this instructive video you will find out how - and why - to use plastic as a temporary base for mosaics.
Watch this video to discover everything you need to know about this unusual approach to mosaic making.
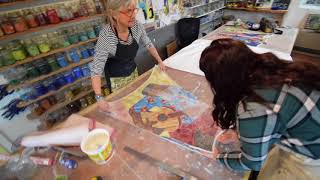
Any plastic surface, whether it be a plastic bag or a piece of perspex is an ideal temporary base for making mosaics using the thin set/tile adhesive method. It allows you the freedom to move the mosaic onto a permanent base later in the process when you are sure about where you would like to set it.
This video takes you through the whole process from choosing which plastic surface to use to making a mosaic on plastic and then removing it once the thinset/tile adhesive has set.
For more information about the tile adhesive method, watch this video:
https://www.youtube.com/watch?v=zQX-jgauWC8
Interested in taking a in-depth class in the classical rules of mosaic making? Try Helen's pre-recorded workshop: Ancient Principles to Contemporary Art, Create a Mosaic Using the Roman Rules: https://helenmilesmosaics.org/product/ancient-principles-to-contemporary-art-create-a-mosaic-using-the-roman-rules/
00:00 Introduction
00:18 Why to use plastic as a temporary base
01:45 Types of plastic
03:07 Using contact paper for mosaics
06:29 Transfering the mosaic
07:46 Making the thinset/tile adhesive
08:59 Making the mosaic, Part I
09:30 Removing the excess tile adhesive
11:50 Making the mosaic, Part II
13:21 Removing a dry mosaic from the plastic

 24:40
24:40
 9:26
9:26
 16:02
16:02
 13:29
13:29
 13:21
13:21
 12:55
12:55
 6:50
6:50
 15:54
15:54
 29:03
29:03
 13:22
13:22
 32:26
32:26
 17:59
17:59
 12:16
12:16
 20:28
20:28
 12:24
12:24
 13:01
13:01
 8:13
8:13
 10:21
10:21
 28:50
28:50
 11:46
11:46


