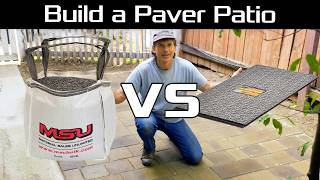
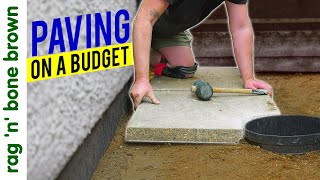
I installed this front yard patio for under $500 with minimal digging thanks to synthetic paver base panels (Brock PaverBase). They seemed costly at first but I saved on having to buy and deliver a large amount of HPB or limestone screening. I saved time and waste created if having to dig at least 3" deeper with the use of traditional paver base like gravel, limestone screening, or HPB. It was also easier and quicker to install patio pavers with the synthetic panels underneath since it was OK to walk on them and rearrange the pavers to optimize the overall stone layout or pattern. And the best part: less or no sagging compared to traditional paver base!
I used only very basic tools and materials for this project, including:
- Ryobi angle grinder #ryobi
- Exacto knife
- Tamper
- Brock PaverBase panels #brockpaverbase
- Play sand
- Paver stones
- Paver edging
- Concrete curb stones
- Flagstone step
One of the items I forgot to mention in my video is that I did have to cut the side of the driveway to ensure a rectified/square edge along the side of the driveway adjacent to the patio. I used my Ryobi angle grinder with a diamond blade for this task and this proved to be quite easy as the driveway asphalt was not nearly as thick as the pavers I was cutting with the same angle grinder.
Short versions of this video:
https://youtu.be/i-xbiySmu1M?si=rdgcg0Poh4XfLH1C
https://youtube.com/shorts/S4_PrbIL3NU?si=DWPaDR0VA3wpJ3_t
Thank you for watching my video! Please Like and consider subscribing to my channel to keep me inspired to post more of my DIY projects!
paver base
diy paver patio
paver stones
how to install pavers patio
paver base panel vs gravel
brock paver base
synthetic paver base panels
patio installation
how to use synthetic paver base
paver base panels vs limestone
panels vs HPB
paver edging
diamond blade
angle grinder to cut paver stones
patio curb

 26:04
26:04
 17:31
17:31
 15:14
15:14
 12:11
12:11
 17:54
17:54
 32:19
32:19
 9:39
9:39
 17:02
17:02
 13:20
13:20
 24:52
24:52
 8:50
8:50
 19:01
19:01
 16:25
16:25
 10:02
10:02
 19:15
19:15
![My 4-Day Fire Pit Patio Build [Full DIY Project]](https://i.ytimg.com/vi/gIxzP8TnMeM/mqdefault.jpg) 13:42
13:42
 13:20
13:20
 34:00
34:00
 24:48
24:48


