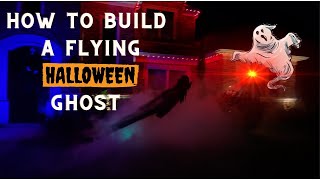
How to Build a Flying Motorized Axworthy Ghost Prop | Halloween Prop
Step 1: Determine how many anchor points you will need based on the length you want your prop to travel. Distances of less than 65 feet can be accomplished using only a starting point and an endpoint.
Step 2: Dig and pour your anchor points. Use a concrete building form for each hole (Quikrete Quik-Tube Cardboard Concrete Building Form Tube 4 ft.). These are available at (Home Depot, Lowes, etc). For my build, I went with 18 inches. Use Quikrete concrete mix, fill the form to the top, and then set a J-bolt concrete anchor https://amzn.to/3WzYXZl
Leave an inch of the threaded end exposed outside the concrete.
Step 3: After 48 hours the concrete will be cured enough to proceed. Install a 4x4 bracket support onto each J-bolt. https://amzn.to/3h4HwzK (Simpson Strong-Tie 4x4 Kit).
Step 4: Begin prepping your pulley system. Using an old bicycle, dismantle the wheels and remove the tires.
Step 5: Calculate and Cut your Top Plate Supports. The length of the top plate will be determined by the diameter of your bicycle wheel and the width of your prop. Attach the front bicycle wheel to your top plate using the original washer and bolt from the bike. Use a 2x4 for the top plate material.
Step 6: https://amzn.to/3U4aCOo Attach a windshield wiper motor to the rear (locking wheel) of the bicycle. You will need a 10mm to 8mm metal coupler: https://amzn.to/3WodCXq
Attach using JB Weld Epoxy: https://amzn.to/3WmNHzf
Tighten the couple screws using a hex key: https://amzn.to/3Fy7V37
Allow the JB weld to cure overnight before attaching it to the top plate or testing.
Step 7: Wire your electrical connections. Using a DC power jack adapter: https://amzn.to/3sSh2nM
and 12-volt AC/DC power adapter: https://amzn.to/3DvTdXt
Step 8: Attach the wiper motor through the top plate using #12-24 x 2inch machine screws https://amzn.to/3UijgII Then attach your top plate to the 4x4 base post using Headlok screws https://amzn.to/3zAgE0I or lag bolts (at least 3 inches in length). https://amzn.to/3zzKFOe Using spray paint, paint the support posts, top plate, and bicycle wheels black. Then set your 4x4 post into the mounting bracket, level, and secure using 3-inch lag bolts. 8 (P.A.M.) lag bolts and 8 (W.A.K.) bolts if purchased from Lowes.
Step 9: Using 50lb fishing line https://amzn.to/3UgaMSf
and barrel swivels https://www.walmart.com/ip/Eagle-Claw-Fishing-Tackle-BBS123-Barrel-Swivel-Black-Size-3/16522801 run your pulley line. Connect the ends of the line and tighten until you have the proper tension for your display. This will be based on the weight of your prop and travel distance. Use a fish leader line to connect your prop to the tensioned line. This will allow you to easily remove the prop from the line (makes it a lot easier when re-tensioning or when the line comes off the pulley).
Step 10: Test your prop, and re-tension until the prop runs smoothly and you now have a flying prop that will be the envy of the neighborhood on Halloween night!
Spice Up Your Display:
Use a fog machine placed in the center of your display under the travel path of your ghost to create an eery effect. https://amzn.to/3NpEZfs I use one on each end of my display. I also use 2 LED spotlights: https://amzn.to/3DOqrCV. Spotlight fixture - https://amzn.to/3zAj2or
Making Your Own Fog Juice:
Use 6 oz pure glycerin https://amzn.to/3TZl8WQ (non-toxic) and mix with 24 oz of distilled water. Shake. This will save you $100s and provide tons of juice for your fog machines!
Chapters
0:00 Introduction
0:37 Calculating How Many Anchor Points You Will Need
3:19 Setting a J-Bolt Concrete Anchor
4:40 Attaching an Adjustable 4x4 Post Base
5:36 Using a Bicycle Wheel to Create a Pulley System
6:52 Measuring and Cutting Your Top Posts
8:09 What Size Bicycle Wheel to Use
9:12 Attaching Your Front Bicycle Wheel to the Top Plate
11:18 Which Wheel Goes Where in the Display
12:36 Powering the Display With a Windshield Wiper Motor
14:20 Top Plate Setup Attaching the Motor to the Bicycle Wheel
15:45 Bolts to Attach Motor to the Top Plate
16:12 Weatherproofing your Power Supply and Motor
17:15 Attaching the Top Plate to a 4x4 Base Post
17:49 Installing a 4x4 Base Post
18:58 Painting Your Display Black (Why we do it)
19:36 Wiring The Display Motor
21:18 Selecting the Right Power Supply
23:16 Running Fishing Line As Your Pulley Line
25:06 Tensioning Your Line
26:22 Cleaning Up the Wiring with Electrical Staples
27:02 Adjustment to Motor Speed
27:36 JB Weld Epoxy Onto Coupler For Added Strength
28:38 Attaching Prop to the Line
29:14 Flying Prop Success!
30:06 TIPS FOR SUCCESS
31:46 Changes to the Attachment Points for the Wheel to the Motor
33:39 Final Thoughts & Conclusion
 27:33
27:33
 26:52
26:52
 26:21
26:21
 30:25
30:25
 28:57
28:57
 33:45
33:45
 16:48
16:48
 20:03
20:03
 23:07
23:07
 19:04
19:04
 17:31
17:31
 14:12
14:12
 7:43
7:43
 23:31
23:31
 4:55
4:55
 27:40
27:40
 27:28
27:28
 12:47
12:47
 4:21
4:21
 21:54
21:54


